
Here is a brief write up of my adventures with the sweet and sexy Extreme-oth:
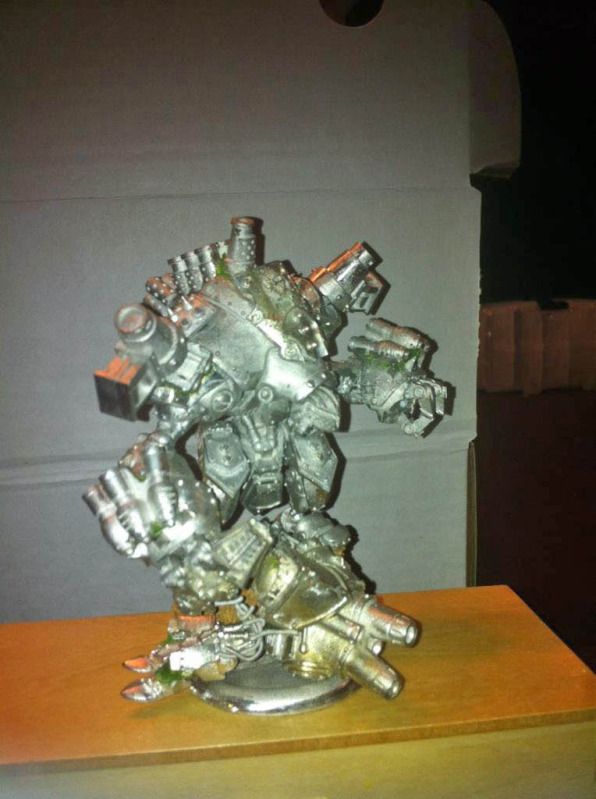
He did all of the converting and asked me to paint it for him. Here is a pic of the starting point:
His instructions were pretty simple... "Don't care about the color scheme, I just want him to look filthy." Simple enough, I thought. Lots of room for artistic license always makes me happy :)
You know you want to see more....
With this guy I decided to try a new technique, kind of my own take on a salt weathering technique that is a three layered primer effect... let me explain:
1) I began by spraying the model with a rust colored automotive primer (sorry I didn't snap pics of the priming stages... kind of did it on a whim real quick like :) )
2.) After allowing the rust colored primer to dry, about an hour or so, ( I would probably suggest you wait longer, but I happen to be extremely impatient) I applied the salt. Here is how I went about my salt application: I grabbed some of my wife's hair spray and sprayed into an open Privateer Press blister to get a nice pool of liquid hair spray. At this point I grabbed a gnarly old brush and began slopping hairspray on the areas I wanted to show the chipped weathering. I then sprinkled Kosher salt (big ol' salt grains) on the hairspray.
3.) After allowing that to dry a bit, I waited a half hour... I again primed the model, this time with black primer. I did this because I knew I would have some areas that were red in color, rust chips wouldn't show as well with the red paint.
4.) I allowed the black primer to dry and repeated step 2.
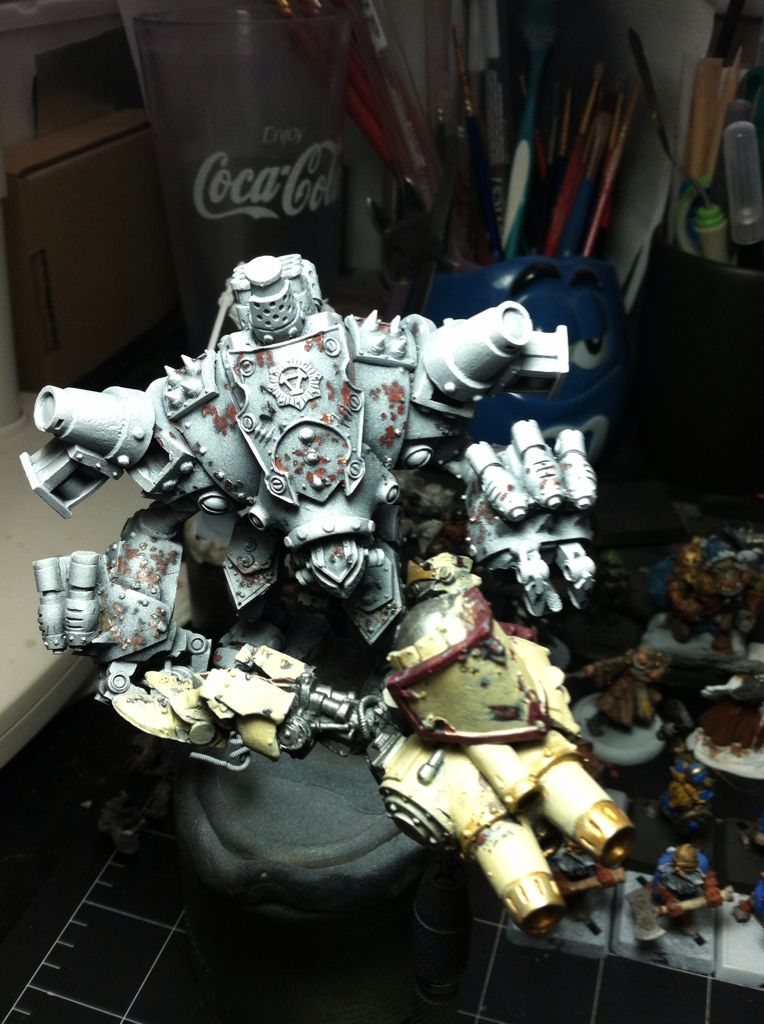
5.) After allowing that to dry I came back with a white primer, spraying from the top mainly.
Here is a picture of the model after the three primer salting technique:

I sat and let this sit and dry for a bit and went and had a game/paint night with some buddies, and talked with them a bit about the salt weathering techniques etc... I was informed that letting the salt sit for too long may eat through the hairspray and possibly the pewter... Getting a bit shaken by that as soon as I returned home from paint night I promptly began brushing the salt away... at first with a toothbrush (it wasn't working as well as I had hoped) then with my fingers and finally I started using a hobby knife as some of the salt was just being stubborn! Here is what it looked like when I finished.
So as you may have noticed on the Menoth Jack... (the torn up jack that is part of his base) I decided to test the theory and base-coated the jack before I removed the salt. Still up in the air on weather or not you should pluck the salt before you paint or not. (Side note: If I owned an airbrush, I would have airbrushed the colors before I removed the salt)
Moving on.... As I began to paint this guy tragedy struck! While trying to paint the underside of some of his armor I heard a *CRACK*, I had zero time to react and... well... Behold the pitfalls of Zip-Kicker:
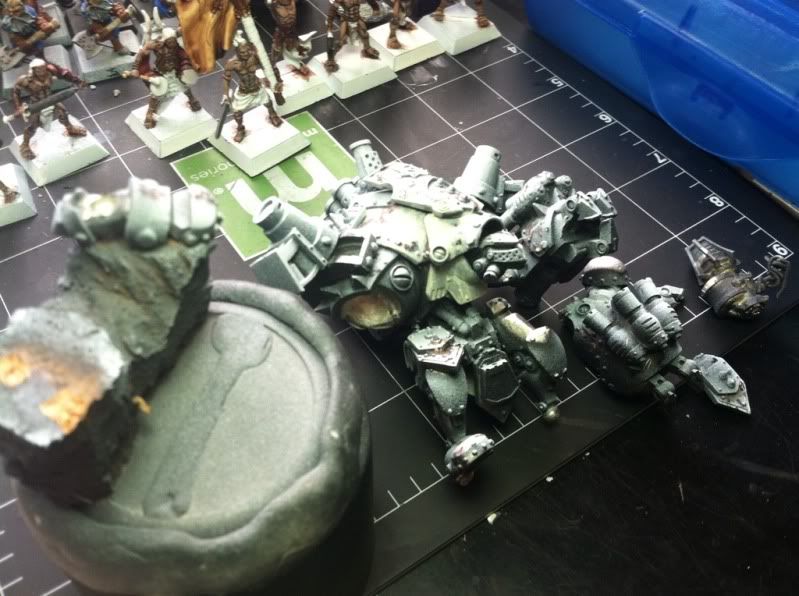
After apologizing profusely to my wife and children for the tirade of profanity that boomed from my painting table, I picked up the pieces and reassembled this guy a bit... to be honest it actually helped me to get some harder to reach spots. Here is another quick update of the painting after the tragedy.
Just the base coats for the armor colors have been laid... mainly so I could see if the color scheme was going to work.
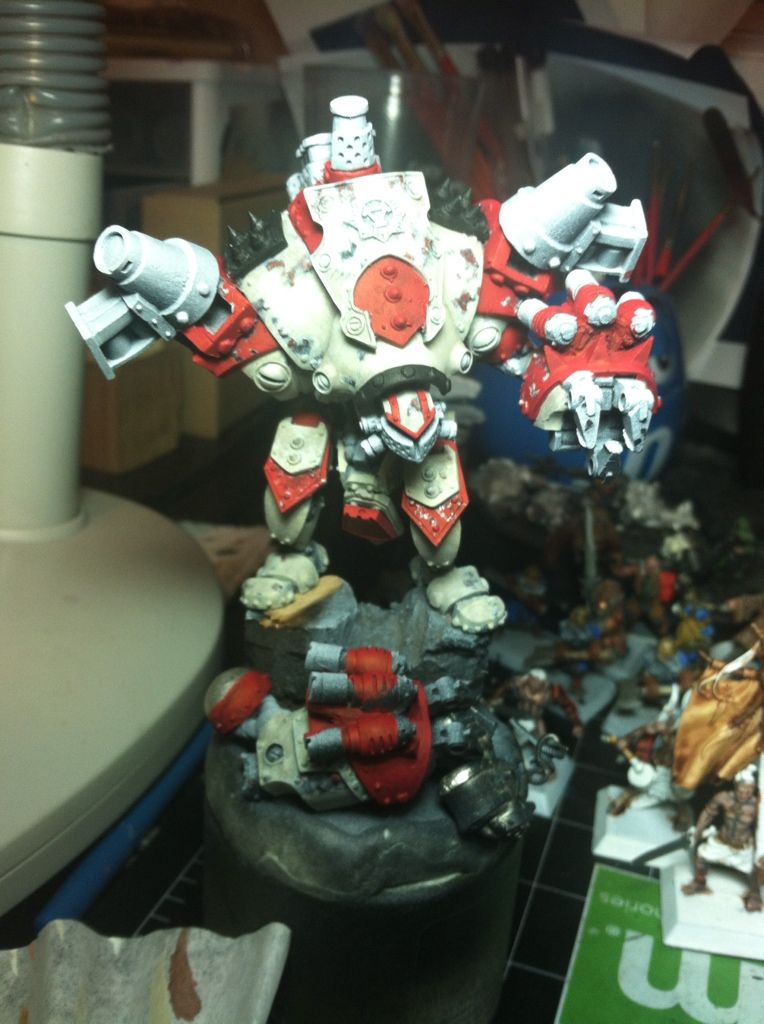
 OK, now here we are, added some highlights did the metallics, and began slathering this guy with washes. Black washes on the behemoth himself, Devlan Mud washes all over the Jack for the base. Here's a pic:
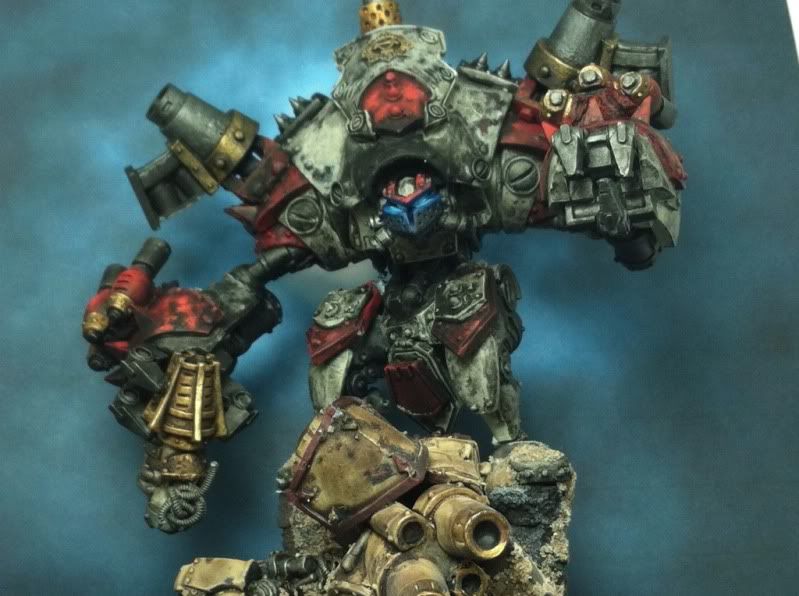
So what do you think?
Working on this guy has been a blast, while there were a few times I was ready to rip my hair out all in all a great experience.
I will finish the base up real quick and then throw a final round of pics up here in the next few days.
But until then
Thanks for Watching!!
-Grim
Looking good.
ReplyDelete